
나오코의집's post
1 / 10
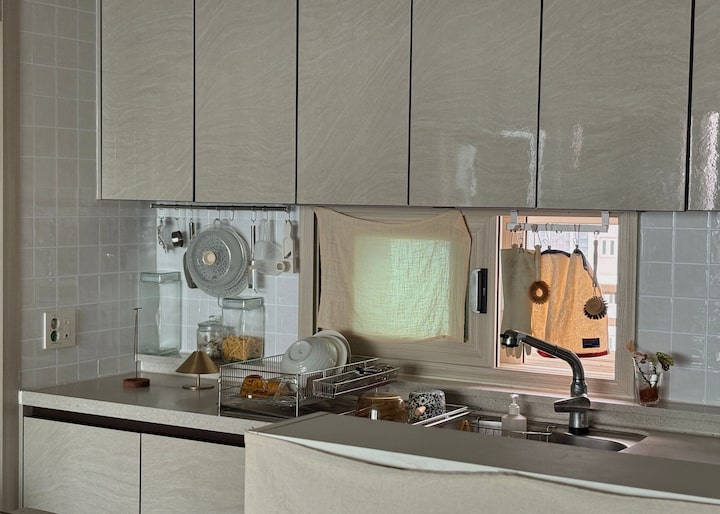
#오감리뷰 This is a review based on my personal experience using and styling the product, which was provided through the Selection Program. A stock apartment kitchen transforming with Sticky tiles⋆˳ ˚ ⋆ #OgamReview This is a review based on my personal experience using and styling the product, which was provided through the Selection Program. Since we moved into a brand-new apartment, it is in its original, unrenovated state with not a single part remodeled. I thought I could express my own style through styling, but the one place where that doesn't work is the kitchen.ᐟ.ᐟ After hesitating for a long time, I decided to take on the challenge of changing the kitchen with Sticky tilesʕ¨̮ʔ First, to describe the original kitchen, it is an extended type in a 30-pyeong apartment. The upper and lower cabinets are high-gloss with a beige marble pattern, and the walls are large, dark gray tiles, giving the overall space a somewhat dark feel. I wanted to brighten the kitchen atmosphere a bit without the cold feeling of pure white, so I chose tiles with a beige tint. The design I chose is ‘Jellyge Square Cloud.’ Square-shaped tiles resembling European plaster walls have been trending for the past few years, and I really wanted to try them out. True to its name, it is a mysterious beige square tile with a cushiony texture that is puffy and shiny, just like jelly. The tiles are approximately 30cm by 30cm. While they feel substantial due to their three-dimensional texture, I found it very convenient that they could be easily cut with scissors or a knife. I was also satisfied that, despite this, they did not appear to be lacking in durability. Since they are being installed on a kitchen wall, it would be problematic if the surface bulged or the corners peeled off easily, but I realized I wouldn't have to worry about that. When installing, you first peel off the adhesive backing from the tiles, attach them to the wall, and then remove the transparent film from the tile surface. However, if any parts require trimming, you can simply sketch the design on the transparent film without removing it, cut the tiles, attach them to the wall, and then peel off the film. This made the process incredibly convenient. At first, I was worried about whether I could properly trim the area under the upper cabinets or around the electrical outlets, but since I could sketch on the transparent film and peel it off later, the trimming process wasn't complicated at all. The tiles have very strong adhesive properties; however, they detach cleanly when pulled with force, so there was no inconvenience when making corrections, and there is absolutely no lifting after installation. To ensure a clean finish, I removed all the silicone sealant around the tile areas before installation and re-sealed it after attaching the tiles. As a result, the tile work was finished much more naturally and neatly. Now that the work is done, I noticed that the tile color looks a bit different and even awkward depending on the kitchen lighting. Up close, it appears beige, but from a distance, depending on natural light or artificial lighting, it can sometimes give off a cold impression, which is a slight disappointment. Right now, it doesn't quite match the upper and lower kitchen cabinets, but since I plan to paint the kitchen furniture soon, I think it's fine. I'm not a professional, so it's not perfect, but the biggest appeal is being able to transform a stock apartment kitchen with my own hands. I also like being able to choose the style I want rather than following trends. It wasn't exactly an easy process, but I recommend sticker tiles for a kitchen makeover that is satisfying both financially and in terms of time. #KitchenInterior #주방꾸미기 #주방셀프시공 #스티컬타일 #접착식타일 #KitchenInterior {1#KitchenDecor} {2#DIYKitchenConstruction} {3#StickerTiles} {4#AdhesiveTiles}
- 09.13
- Likes
- 19
- Saved
- 15
- Views
- 42
Comments0
